Introducing: Pocket Coach Pro

This project has been near and dear to my heart long before I wrote a single line of code. That said, I think it’s understandable I”m pretty nervous about this pre-announcement. BUT, I also look forward to helping people change their lives for the better. Count this as a semi / unofficial announcement. 🙂

Several years ago I started getting more serious about my health and began searching for fitness methods that worked. I actually had a lot of trouble finding something that gave me results and was interesting enough to keep doing it. Running wasn’t it. Getting to local hiking spots was too time consuming. Attending the big gym down the road was overwhelming with all those machines (and therefore ineffective). Personal training was way too expensive. What I found wasn’t a set or specific routine or program that gets old after a while (you know those videos you can buy). It also wasn’t a fad celebrity workout.

It took a few years, but things finally started to click. I wanted something that reflected functional fitness to prepare me for “life,” and I needed structure to tell me what I should be doing.  I also wanted a system that was efficient and effective. I’ve been doing this for a few years now, and I can say that it works for a wide range of fitness levels. Most importantly, this system is sustainable for a healthy lifestyle.

Visit Pocket Coach Pro

The app isn’t quite done yet, but we’re getting there. Count this as a first look as we start to get the name out in the wild. Head on over and sign up if you’re at all interested. From time to time I’ll send out sneak peeks, some insider-only info, and I’ll throw in a little bonus for you to make it worth your while. And don’t worry – I don’t do the spam thing. I treat you the way I would also like to be treated – with respect.

I have no set launch date, but it will initially be available for iPhone / iPad, and likely thoughtful integration with Apple Watch.

Why I’m Excited about watch OS 2

For those who don’t already know, I have Repetition Workout Counter in the AppStore for iPhone and iPad. The most recent release – version 2.0 – added support for Apple Watch from day one.

I didn’t quite know what to expect out of the Apple Watch. It’s quite an elegant piece of hard ware and software engineering. That is, until you start using third-party apps. The issues I (well, and many others) have is that running the app as an extension on the phone and communicating UI changes over Bluetooth has been problematic. It’s slow. Sometimes it doesn’t connect.

In the case of Repetition, it only does two things – increment a counter, and control the stopwatch function. At times even these are painfully slow – and I’m only sending minimal payloads (most often a single key:value pair) over the air to the Watch.

Now, enter watchOS 2, announced yesterday at WWDC. This is what we developers have been waiting for – the ability to run apps natively on the Watch, some UI improvements, access to hardware components, complications, and more.

For apps like Repetition, that means some key advantages over WatchKit:

  • Immediate UI updates. (counter and timer are immediate)
  • Haptic feedback from the taptic engine (say, a little buzz every X minutes)
  • Better heart rate monitoring
  • No need to be near your phone during workouts.
  • Watch face complications with the current reps and timer w/o having to open the app

So, you can see why we’re excited for these enhancements. I really think the watch is perfect for two things – notifications and exercise. With Apple pushing the Health aspect so much, I wouldn’t be surprised if they felt the same way.

Automating iOS + Watchkit build numbers, with Git, for iTunes Connect

This wasn’t especially difficult, but it was a little tedious to track down.

I’ve relied on a handy little build phase script (I wish I remember where I found it) for automating build numbers from git commits for iOS apps since Apple gave us access to TestFlight via iTunes Connect. This same script didn’t work for my Apple Watch app as I anticipated, so it took a little bit to work out the kinks for AppStore submission.

It boils down to this

  1. Set the build number = the number of git commits on the branch.
  2. Change the Info.plist build numbers for the iOS app target, the Watch App target, and the Watch Extension target. This is done in a script build phase before the “Copy Bundle Resources” phase.
  3. Reset the Info.plist build numbers after all the build phases have run (another script build phase)

See the gist I posted for the complete script. Make sure to check the directory paths for the correct app name.

Happy building!

Jay Fields on Unit Testing

Working Effectively with Unit Tests – Interview with Jay Fields

I rather enjoyed this interview with Jay. It was nice hearing a reasonable voice in the discussion – namely, there’s no need to be over-zealous about any one approach. Even in my own work I’ve seen a tremendous benefit to testing as I write code. It saves a lot of headache and provides some assurance that things still work down the road when code changes. Of course, as always, you need to be confident your tests are thorough enough in the first place.

Measuring Perceived Performance

Measuring user perceived latency | Foursquare Engineering Blog.

I’ve found one of the most important components of performance is the perception. Within reason, the actual performance doesn’t matter as much as how people perceive actions to be progressing and completing.

This is about the user’s experience.

Consider the two possible experiences of loading a web page. In one version – the browser waits until all content is loaded. The other version – the browser progressively loads content, as we’re typically used to. Which one will feel faster, less frustrating, and more “productive”?

Are you doing the same in your app? Luke W explains it well in his post about content loading spinners.

Localizing Your iOS App: Tutorial, Tips, and Tricks

I recently ran through the process localizing a client’s app. It took some time to fully wrap my head around the inner workings, but now in hindsight it seems relatively simple.

The general overview looks something like this:

  1. Identify strings that need localization
  2. Generate .strings files
  3. Export & send to translator
  4. Import translations
  5. Some Gotchas [Edit – this is new since this post was first published; I will add to it from time to time.]

If you would like to follow along at home, you can checkout the project on Github.

Pre-flight Check

Before we get going, it’s important to make sure all our ducks are in a row. You need to ensure your project settings file has Base Localization turned on. Go ahead and add a second language, which will kick off a few other operations you’d have to run manually. Among them is adding the en.lproj and the other language’s lproj directory.

Xcode project settings

In most cases, you want to turn on Base localization for your storyboard and xibs. Do this by opening the storyboard or xib, and checking “Base” in the Localization section of the File Inspector. Make sure English and the second language are both checked and the type is Localizable Strings, not Interface Builder Storyboard. This tells the app to use the base localized storyboard for all the layout, and the strings as the language-specific content source.

Interface builder view

You should have something similar to this

Project file list

Identification

The first step is to identify strings that need to be localized. It shouldn’t be hard – anything user-facing should be translated, except for a few words, such as brand and app names (though you can localize the app name if you wish).

Let’s start with some code.

@IBOutlet weak var introLabel: UILabel!
override func viewDidLoad() {
    super.viewDidLoad()
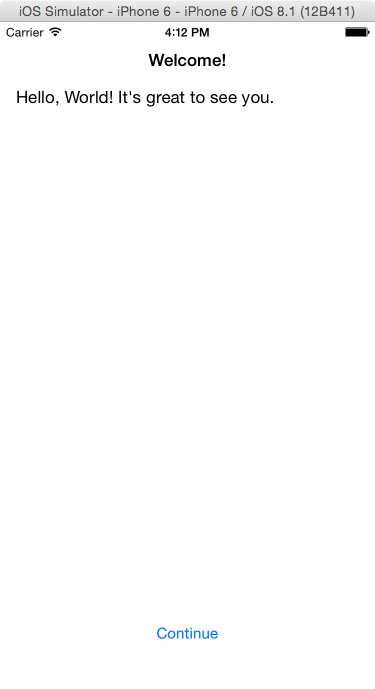
    introLabel?.text = "Hello, World! It's great to see you.";
}

This is a likely scenario – you’re setting text programmatically. The problem is that it’s only going to be in one language. The first step is to use the NSLocalizedString to provide a key name, and a comment used by the translator.

While you can rely on autocomplete to give you a rather verbose NSLocalizedString function, use this tip to take advantage of default values, leaving you with something equivalent to the Objective-C macro. For starters, use your English string as the key:

introLabel?.text = NSLocalizedString("Hello, World! It's great to see you.", comment: "A friendly greeting presented to the user when first opening the app.");

(We’ll change the key name later). Do this for every string you want translated.

Generate Your Strings

It’s time to run the genstrings command in the terminal – this will take all those NSLocalizedString keys and comments and spit them out in a strings file.

find . -name *.swift | xargs genstrings -o en.lproj

Note: This will only work if you have the en.lproj directory created as part of our Pre Flight. Go ahead and drag the en.lproj/Localizable.strings file into your project. Put it in the Supporting Files group. Open it up. You should see this,

/* A friendly greeting presented to the user when first opening the app. */
"Hello, World! It's great to see you." = "Hello, World! It's great to see you.";

Caution: From this point on, you should not run genstrings on everything – only on new files that haven’t been processed yet. genstrings will overwrite.

Let’s change the key name in the .swift file and the .strings file:

introLabel?.text = NSLocalizedString("Message_GreetingText", comment: "A friendly greeting presented to the user when first opening the app.");
/* A friendly greeting presented to the user when first opening the app. */
 "Message_GreetingText" = "Hello, World! It's great to see you.";

Run the app. Still works. Now, go through your strings and swap out the keys for something not quite so specific. After all, your text could change, so a descriptive key would be helpful.

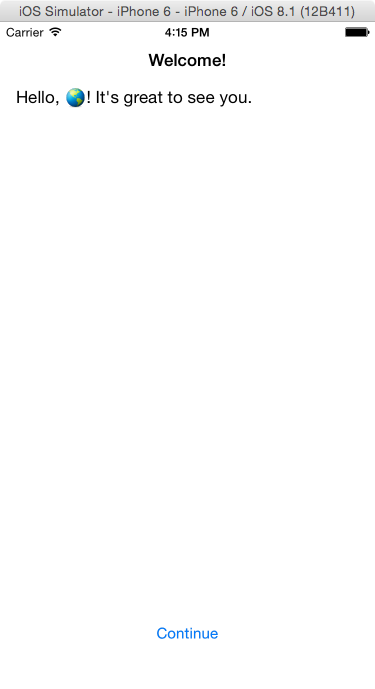
Now, change the value in the Localizable.strings file and re-run. Great, right!? You can see it’s working just fine – NSLocalizedString is correctly loading the content from the strings file. Time to move on.

Standard translation Changed the translation string.

Storyboards & xibs

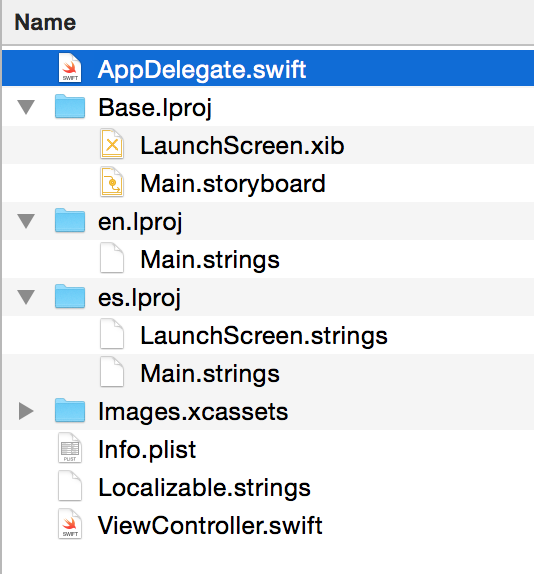
Remember the preflight where some things happened, and maybe you didn’t understand it? Let’s look to storyboard in the Project Navigator. Notice that disclosure arrow to the left? Click it. I’m looking at the Main.storyboard (Base), Main.strings (English), and Main.strings (Spanish). Go ahead and click on the Main.strings (English) file.

Yuck!

Unfortunately, your’e kind of stuck with these ugly key names. They refer to the XML IDs in the interface file. If you look at the strings file in my demo project, you’ll also see accessibilityHint and accessibilityLabel values. It’s important that accessibility information (you should have it) be localized for screen readers.

Change one of the normalTitle values and re-run the app.

Pretty neat, huh?

Tip: If you ever need to add new UI elements to the interface file, work on the Base storyboard, then toggle the development language (e.g., English) From Localizable Strings to Interface Builder Storyboard, and back to Strings. The file will be re-generated. (You’ll be asked to confirm you want to do the conversion at both points).

Tip: Don’t bother trying to change the comments, either, unless you absolutely know you’re done tweaking the interface. It is more helpful to provide translators with screenshots if they are kind enough to take them. Context goes a long way.

Caution: There’s one problem you will run into – UITextViews. For some reason, as of iOS 8.1, an iOS bug prevents UITextView text values from updating. You’ll have to set it separately via NSLocalizedString. It’s a pain.

Export

Time for export. Xcode 6 introduces xliff file support – something that I understand is an industry standard in the translation community. To begin, select the top-level project in the Project Navigator, then go to the Editor menu > Export for localization…

In the dialogue that follows, select “Development Language Only”.

Save the file anywhere (I like to keep it versioned in the project root… on the filesystem, not in the actual Xcode project). I usually give it a name like “Translation Files”. It might take a few moments to process.

When you’re done, you’ll have a handy file called en.xliff (if English is your dev language). This is what you send off to the translator.

Import

The import process is easy. Select the project, then go to Editor > Import Localizations… . Xcode will do the rest.

Testing

Besides testing in your development language, make sure all the strings are displayed properly. You can even do this before a single word has been translated. Try running the app with pseudo localization. Open the scheme settings (Product > Scheme > Edit Scheme), select the Run group, and then click on the Options tab.

Check Localization Debugging (will show non-localized strings in all-caps).

Application Language – I often use Double Length pseudo language.  It makes all your strings twice as long. Sometimes you’ll see some funny formatting, especially if you have string substitutions (e.g. stringWithFormat) as part of your values. That’s ok – it’ll still work.

You can also export your xliff to an online service that will provide you with automatically generated pseudo languages you can try in the app. It’s funky looking, but it gets the job done. They’ll provide you with the appropriate instructions for their service.


Some Gotchas

NSLocalizedString with table

I didn’t catch this at first on a recent project. It’s subtle, yet frustrating to diagnose.

When using NSLocalizedString, and you reference a table, the translation export procedure will create an entry in the xliff file for the tableName.strings, which means on import, the appropriate .strings file will be generated. It’s worth noting.

Look for tableGenerationExample() in the demo ViewController, then look in the en.xliff export file. Scroll down until you find this section,

  <file original="LocalizationDemo/generated_table.strings" source-language="en" datatype="plaintext">

Look familiar?

The Case for Slow Programming

A thought-provoking post by Jeffrey Ventrella. I’ve seen both sides. Surely there’s little to be gained by maintaining breakneck development speeds – when the goal is more features as fast as you can. It might look good to business, but there’s a chance it comes back to bite you. I can appreciate taking the time to figure things out, test, and tinker before reaching the final solution. Software is as much an art and a craft as it is math and logic.

7 Rules for Creating Gorgeous UI

7 Rules for Creating Gorgeous UI (Part 1)

In the end, I learned the aesthetics of apps the same way I’ve learned any creative endeavor: cold, hard analysis. And shameless copying of what works.

I’m enamored with well-designed objects, software, though I’m not a designer. I appreciate posts like this one because it scratches that inner itch and provides useful pointers I can use.

Unit Testing CoreData Tip: The Singleton

It’s been a while since I was deep into CoreData, but here I am again. And this time, I’m writing proper unit tests.

Things were going pretty well – I had about 50 test cases with a few related asserts in each – until I started messing with saving, and fetching tests. I ran into some odd behavior where sometimes a particular test would pass, other times fail with different results in one assertion. All I was doing was creating a managed object, setting a relationship, saving, and reading back to check for proper order. Pretty trivial stuff.

I looked deeper.

If I ran just that one test case by itself, it would always pass. If I ran “All Tests”, it would always fail. Sometimes I would get several fetched objects when only one was expected. Sometimes those would be in different orders.

As I dug deeper, I attempted to reset my context on each test case

[self.managedObjectContext reset];

No luck.

To this point, my managedObjectContext has been a singleton – to follow the pattern of the rest of the appellation. I had a hunch the problem might be there – especially if multiple tests are running (concurrently, even?).

+(instancetype)inMemoryManager {
    static DataManager *sharedInstance = nil;

    static dispatch_once_t onceToken;
    dispatch_once(&onceToken, ^{
        sharedInstance = [[DataManager alloc] init];

        NSPersistentStoreCoordinator *persistentStoreCoordinator = [[NSPersistentStoreCoordinator alloc] initWithManagedObjectModel:[sharedInstance managedObjectModel]];

        NSError *error;
        if (![persistentStoreCoordinator addPersistentStoreWithType:NSInMemoryStoreType configuration:nil URL:nil options:nil error:&error]) {
            NSLog(@"Unresolved error %@, %@", error, [error userInfo]);
        }

        sharedInstance.persistentStoreCoordinator = persistentStoreCoordinator;
    });

    return sharedInstance;
}

I tried creating a separate for-testing-only manager that creates a new stack each time so I could hopefully avoid these apparent concurrency issues.

+(instancetype)inMemoryManagerForTesting {
    DataManager *dataManager = [[DataManager alloc] init];
    NSPersistentStoreCoordinator *persistentStoreCoordinator = [[NSPersistentStoreCoordinator alloc] initWithManagedObjectModel:[dataManager managedObjectModel]];

    NSError *error;
    if (![persistentStoreCoordinator addPersistentStoreWithType:NSInMemoryStoreType configuration:nil URL:nil options:nil error:&error]) {
        NSLog(@"Unresolved error %@, %@", error, [error userInfo]);
    }
    dataManager.persistentStoreCoordinator = persistentStoreCoordinator;

    return dataManager;
}

That seems to do the trick, though I would have preferred sticking with the singleton. Don’t use CoreData stack singletons. Turns out @orta suggests the same [tweet] [blog post].

iOS TDD (Test Driven Development) – Convincing Myself

By no means is TDD (Test Driven Development) a new concept; I’ve known about it for years. I had sone some unit testing on projects prior, they became an integral part of routine when I started consulting for HP’s Software R&D lab. We’ve been very good about testing out all the important logic of the application, save automated functional testing of the UI (more on that in another post).

This post is really about TDD, not convincing you to unit test your code (something you should be doing). Actually, I’m not a diehard TDD fanatic. Rather I use principles of testing first before writing application logic. I don’t want to get stuck the pedantics of true TDD development.

My journey, if you will, started as I had a turning point in two projects for Pivotal Action that convinced me. The first project involved a bit of interplay between iBeacons (CLBeacon) and networking, which would be impractical to manually test with physical hardware. The second project involves a lot of transformations being applied to objects, and some networking. In both cases, relying on rather extensive unit tests could ensure I wasn’t breaking functionality with new features.

My general approach involves a few simple practices:

  1. Create a mock data set for input. I often use JSON files because it’s easily readable, and you can use the same data on multiple tests if you need. Also helpful if you’re testing mock network response data
  2. Create a test data set, or scenario. First pass, go with the “golden path” – the best case scenario
  3. Determine what your desired outcomes are in a best-case scenario
  4. Create separate test cases for each kind of data you may have to deal with. Again – start with the best case scenario
  5. Write some logic code to either transform data, or respond to it
  6. Go back to step 1 and create a new set of data representing one type of problem, or family of very similar problems. This could be malformed data, error codes from API services, etc. as well as common problems : out-of-bounds errors, off by one, nil, and others.
  7. Keep repeating 2-5 until you’ve exhausted just about every scenario you can reasonably think of.

This may seem boring and repetitive, but I assure you that thoroughly testing your logic will uncover holes in your implementation before you even start writing application and UI code. You’re also more likely to survive refactoring unscathed if you have extensive unit tests covering the changing code. I recently benefitted from this when I converted a set of model classes over to a CoreData stack. It wasn’t a perfect 1:1 refactor, but it uncovered some places where I had to adapt my expectations and logic so that the transformations would be the same in the end.

I’m not perfect at this, but I can say that doing unit testing before really getting into the guts of an application has saved me a lot of work farther down the road. I also have more confidence that changes I make aren’t breaking existing functionality. Give it a shot.

Hey there! Come check out all-new content at my new mistercameron.com!